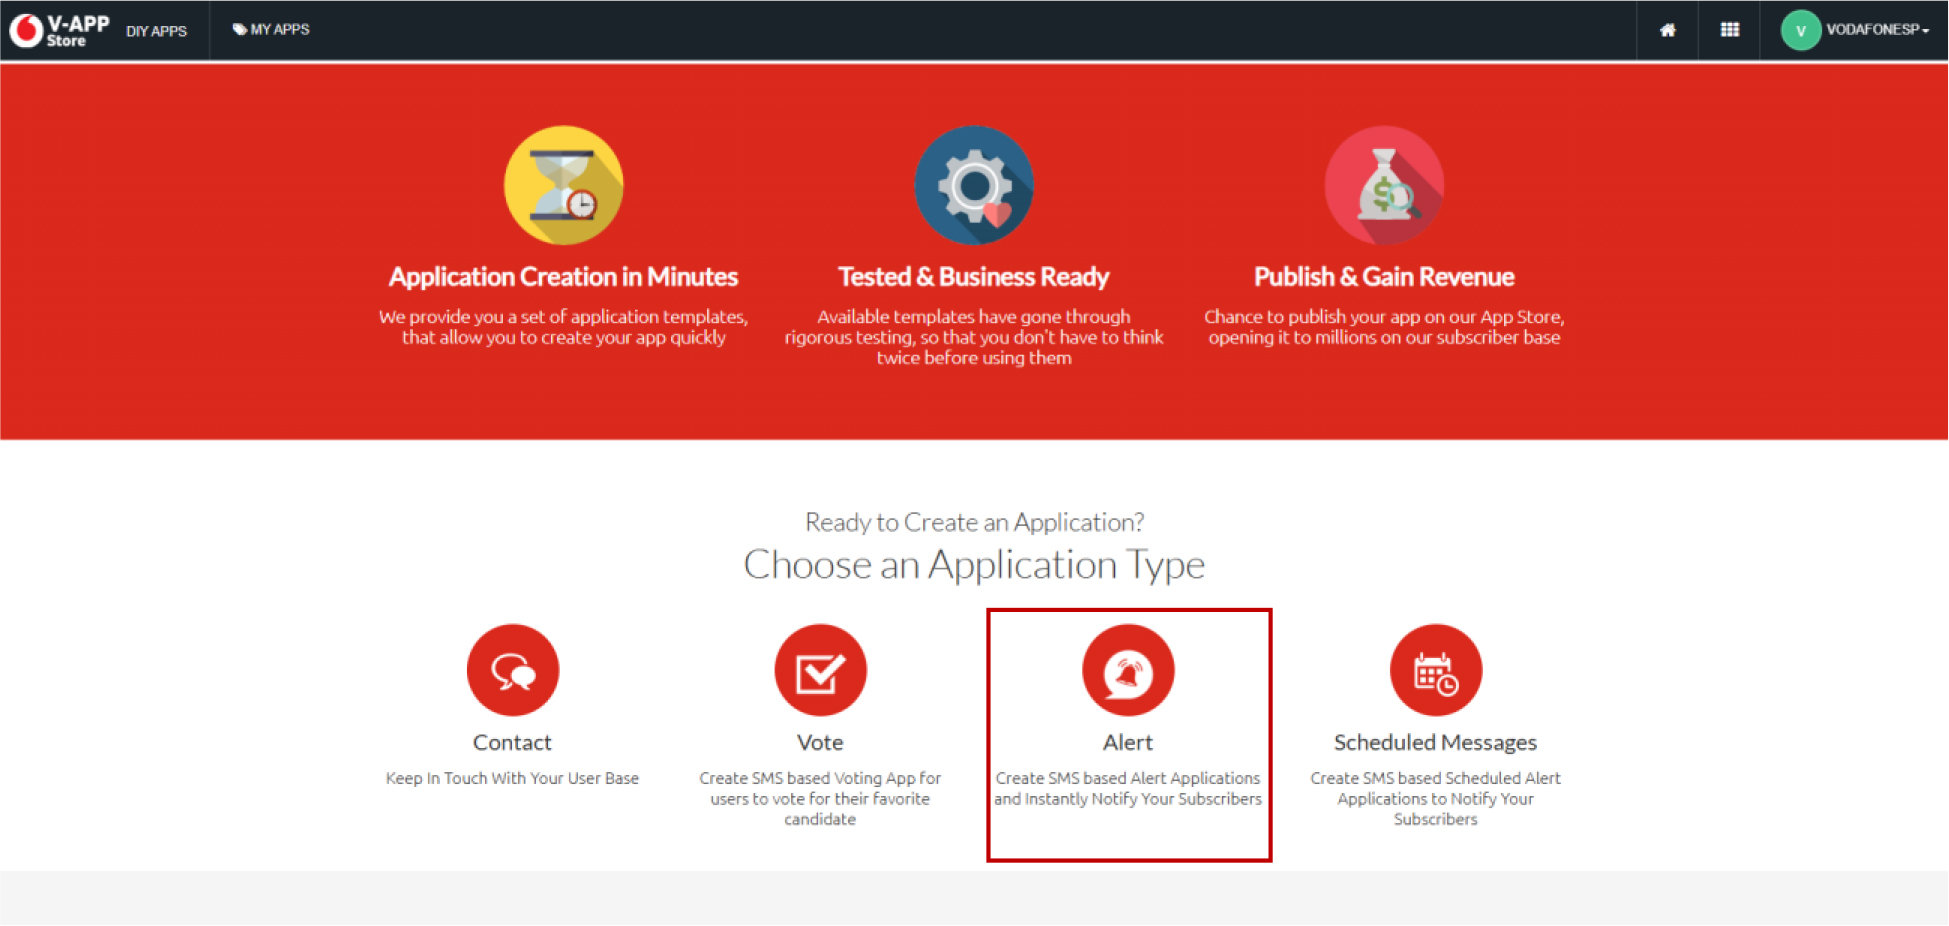
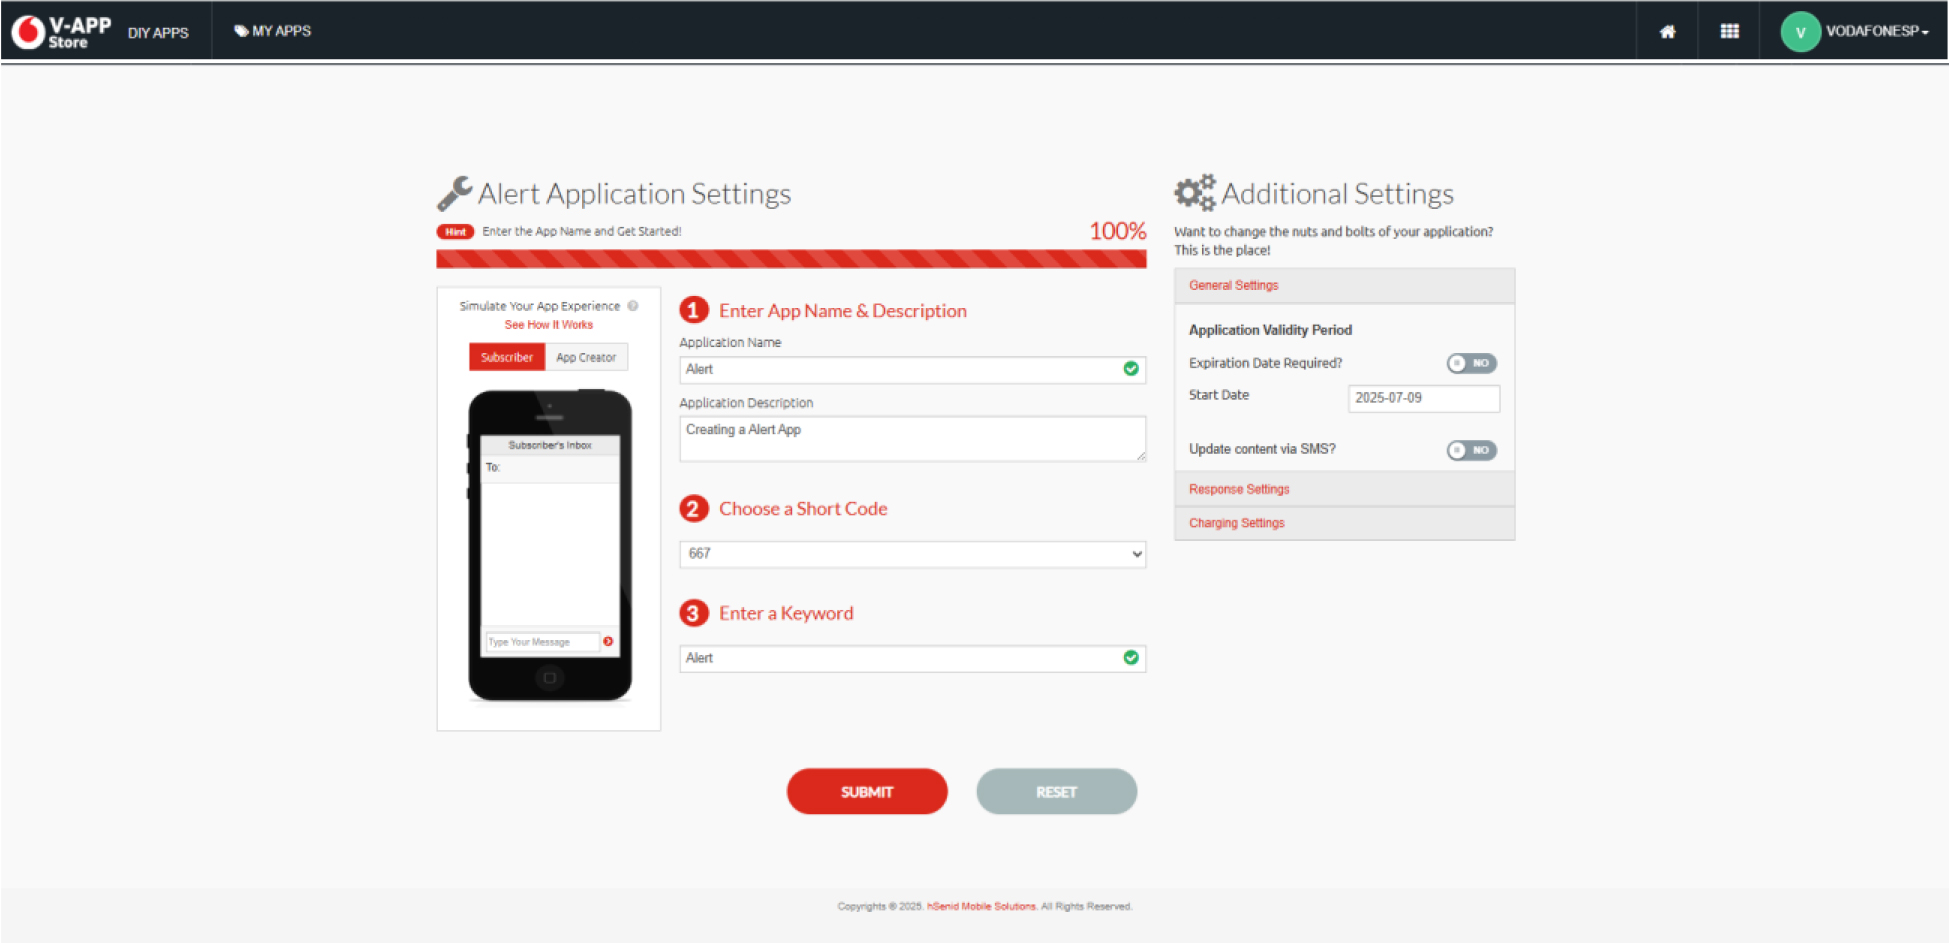
Step 1 - Click on the Alert button as shown below.
Step 2 - Fill the details regarding your Alert application.
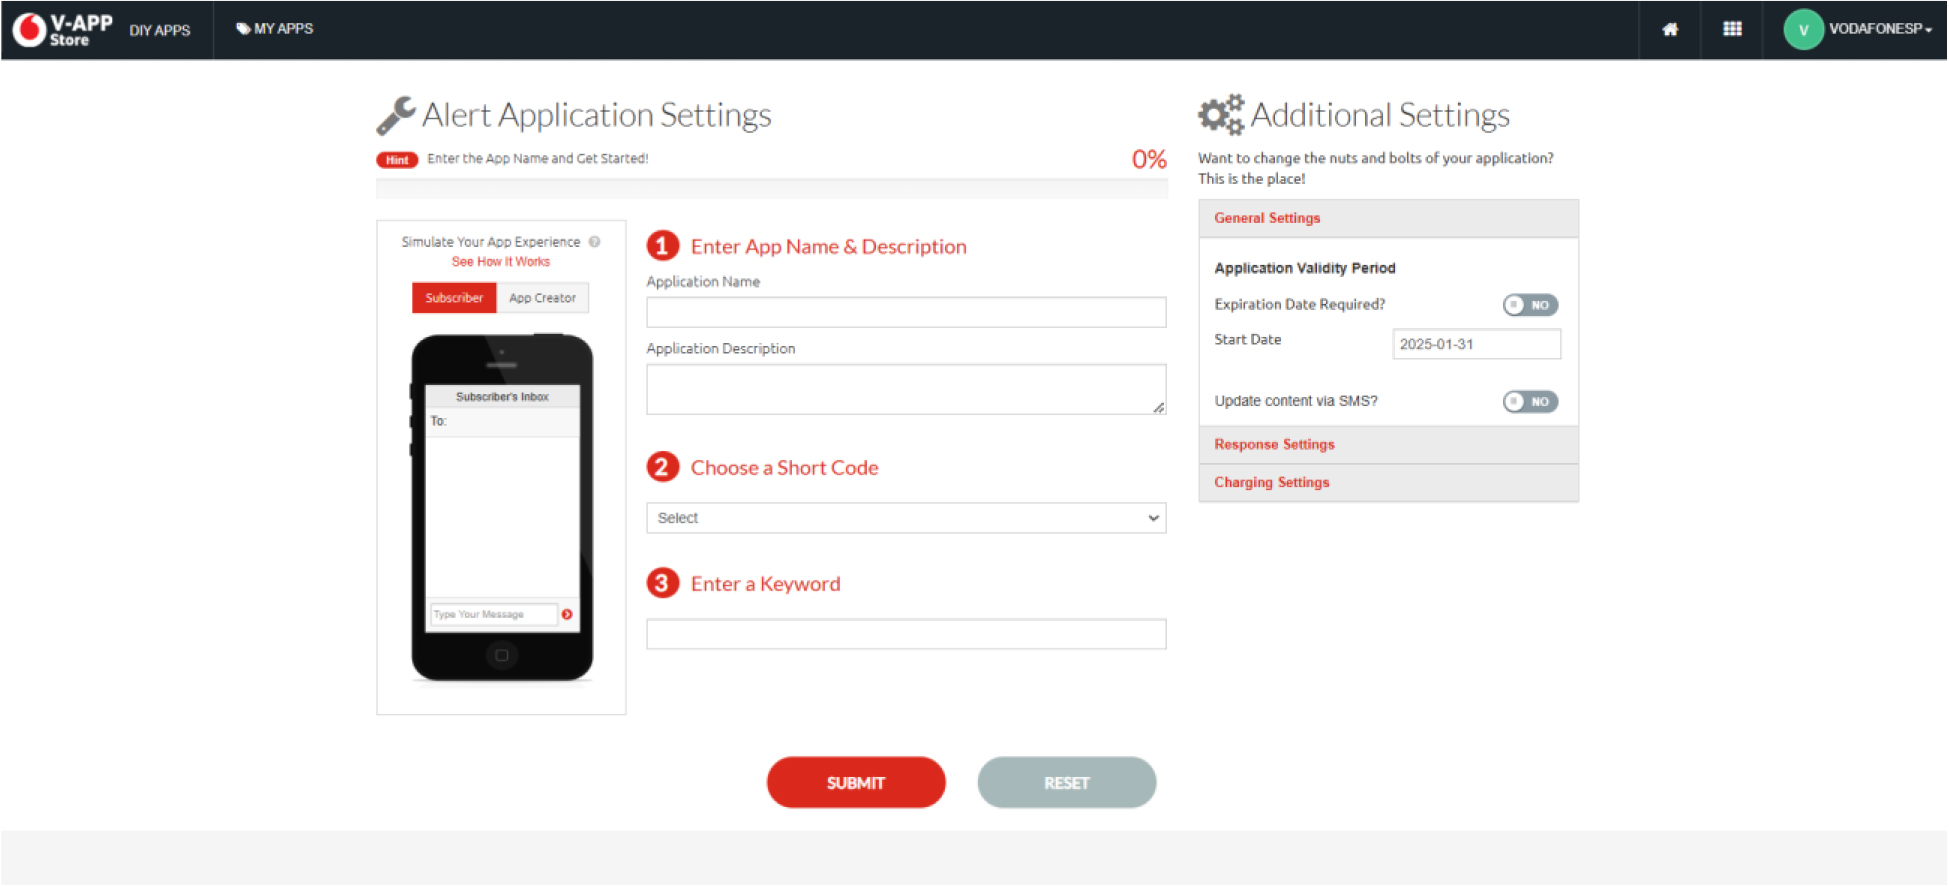
Application Name – Should have 4-9 characters.
Application Description- Give a proper description about your application and its purpose
because it will be easier for the admin to approve your app quickly.
Select a Short Code from the given list and enter a Keyword.
Keyword must be a simple unique term which doesn’t already exist.
Step 3
Additional SettingsGeneral Settings
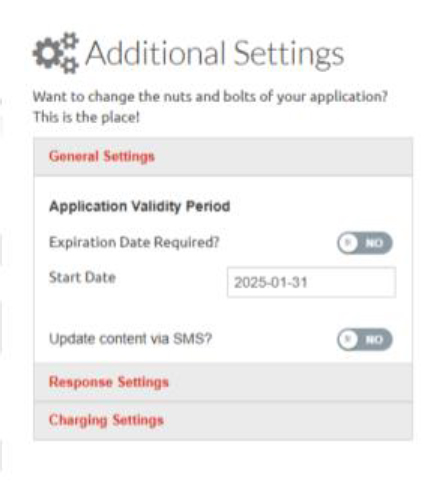
Application Validity Duration – If your Alert Application is limited for a certain period of time,
enable the 'Expiration date required?' toggle and specify the expiry date.
If you need to
'Update Content via SMS?' enable the toggle to update.
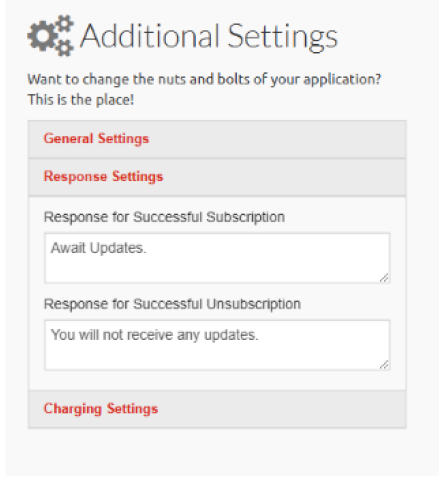
Response Configurations – The above-mentioned details are set by default. But you can edit
them to whatever you need.
Add a creative response message.
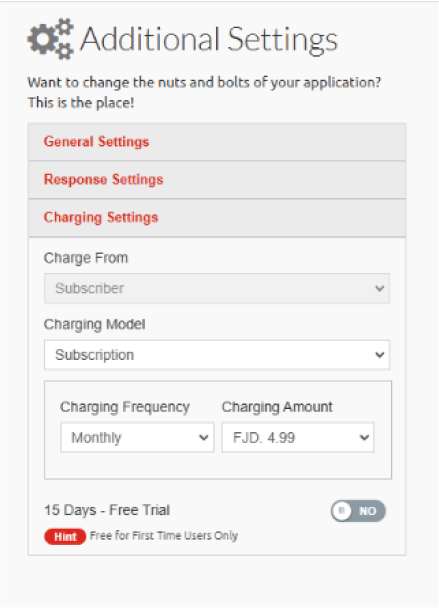
Charge From– These details are set by default.
Charging Model– You can select Charging Model as 'Subscription' or 'Per Message'
Charging Frequency – You can select Charging Frequency as 'Daily' or 'Monthly'.
Charging Amount – Charging amount shall be a default.
You can activate a 15-day free trial by enabling the '15-Day Free Trial' toggle. This is only available for
first-time users of the app.
Step 4
The provided details will be displayed as shown below.
Re -check the details you have entered, modify any changes and click Submit.